
A job costing Excel template is a simple tool for a tricky problem. It’s a spreadsheet made to track all the costs—labor, materials, and other business expenses—for a specific project. This shows you how much money a job is really making (or losing). It helps you stop guessing and start controlling your profits.
Why Guessing Your Job Costs Is Sinking Your Business
Have you ever finished a project, looked at your bank account, and wondered where the profit went? You’re not alone. I see it all the time with business owners, from builders to designers. They are flying blind with their numbers.
Job costing just means knowing what each project costs you. It’s not just the big things. It’s all the small costs that eat away at your profit. Ignoring this is why businesses bid too low on jobs, which means you're basically paying to do the work.

Where the Money Really Goes
Here is a simple look at the main costs you need to track for every project.
| Cost Category | What It Includes | Simple Example |
|---|---|---|
| Direct Labor | Pay for people working on the job. | An electrician's hours spent wiring a new house. |
| Direct Materials | All the supplies and parts bought for the job. | Wood, drywall, and paint for a room remodel. |
| Overhead | Costs to run the business that are not for one job. | Office rent, software, insurance. |
Getting these three buckets right is the first step to good job costing.
Let's imagine a small marketing agency that quotes a fixed price for a new website. They estimate the designer’s time but forget to add:
- The five extra client meetings that weren't in the plan.
- The monthly cost for their project management software.
- The hours the project manager spends keeping everything organized.
Each of these is a real cost. When you don't track them, your "profitable" project can turn into a loss without you even knowing. You can see more examples for different industries in our guide on what is job costing in construction.
A Real-World Example
The construction industry is a great place to see a job costing Excel template in action. For a bathroom remodel, the numbers might look like this: supplies could be £1,615.95 (62%), labor is £940.00 (36%), and other small expenses add £61.25. The total job cost is £2,617.20.
This kind of tracking helps you avoid bidding too low. A huge 30% of construction firms say they lose money because of bad cost estimates. You can read more about this on job costing fundamentals from Business Accounting Basics.
The goal isn't to make you an Excel expert. It's to give you a simple tool to control your money, one job at a time.
When you know these numbers, you stop guessing and start making decisions based on facts. You'll know which jobs make you money, where you're losing money, and how to bid on future jobs. For any business that does projects, it’s a game-changer.
How to Build Your Excel Template
Okay, let's open a blank Excel sheet and start. We're going to focus on what you really need to build a simple, strong job costing template. The idea is to make a few worksheets that work together.
Think of it like setting up a new workshop. You have a bin for screws, a drawer for tools, and a rack for wood. By keeping everything in its own place, you know where to find it. We’re doing the same thing here, but with your project numbers.
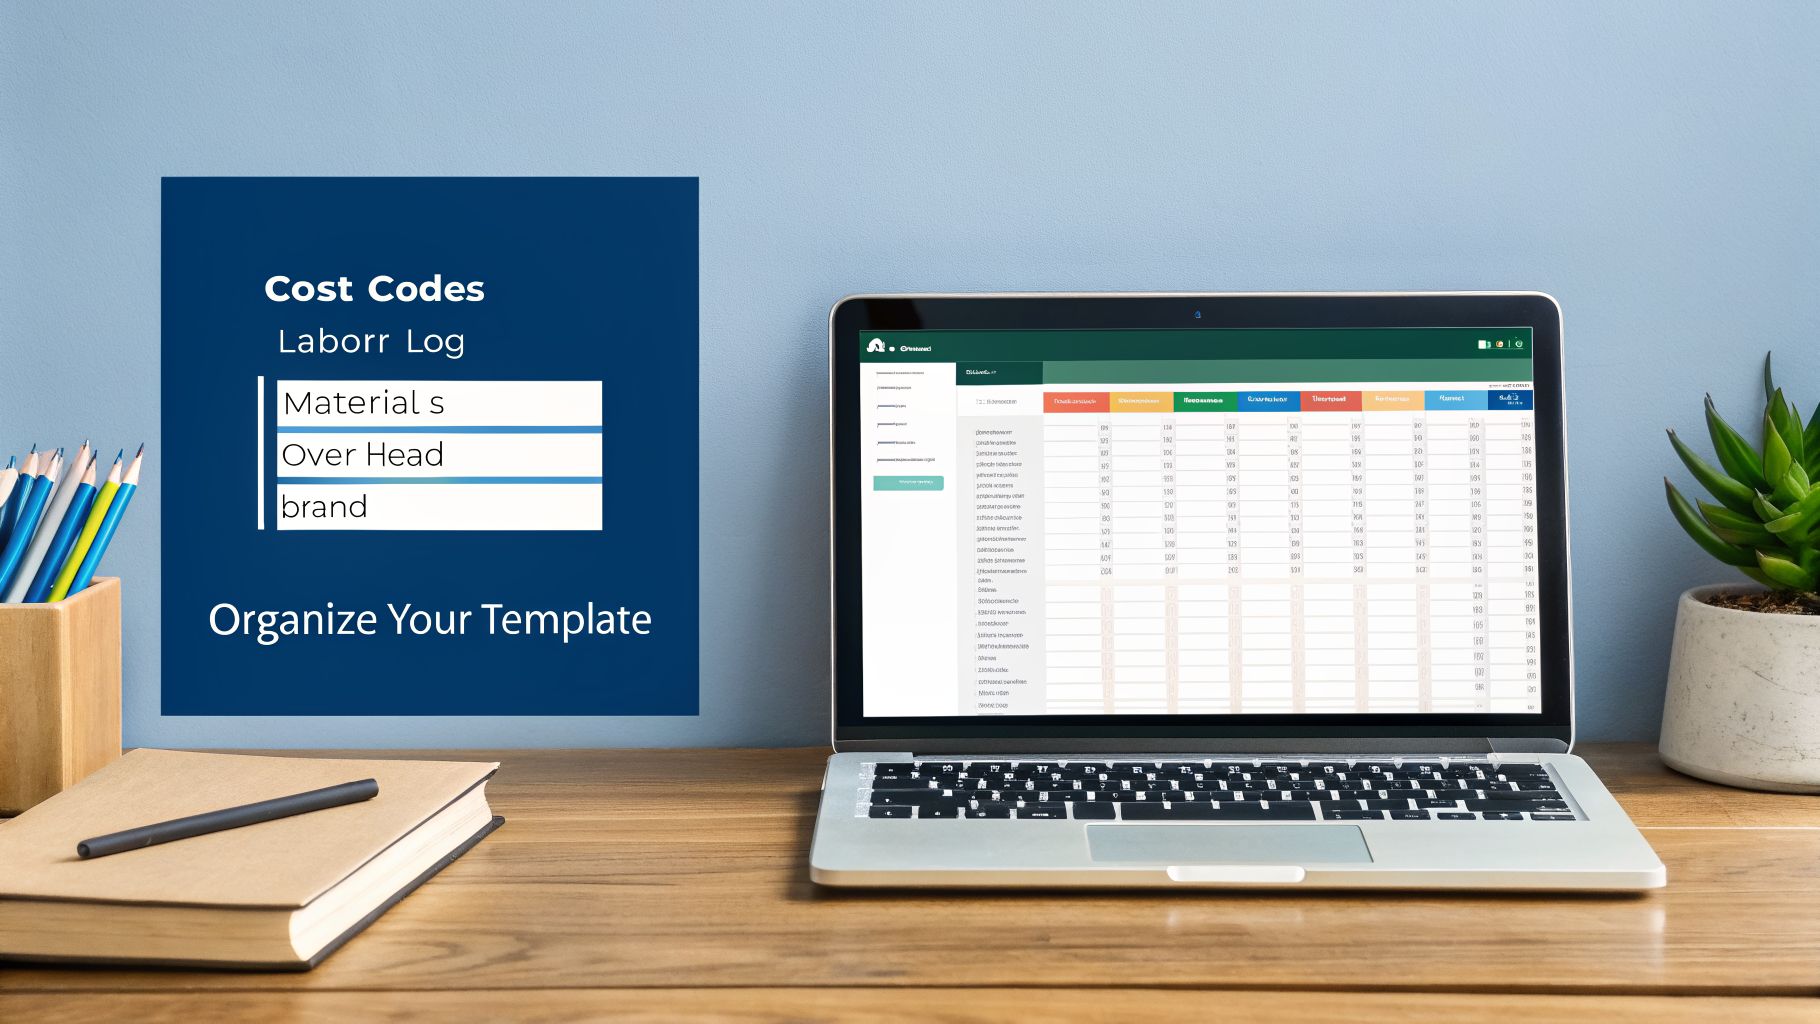
Creating Your Main Worksheets
First, we will make four separate tabs, or "worksheets," at the bottom of your Excel file. Just right-click on "Sheet1," choose "Rename," and call it Cost Codes. Then, click the little plus (+) sign to add and rename the other three sheets.
These four tabs are the foundation of your job costing system:
- Cost Codes: This is your list of every single type of expense in your business.
- Labor Log: This is where you track every hour worked by every person on every job.
- Materials Tracker: This sheet will list every physical item you buy for a project.
- Overhead Costs: Here, you’ll list all the business expenses that aren't for one specific job, like rent.
Keeping these separate is important. It makes entering information easier and stops the spreadsheet from becoming a confusing mess. A messy template is a useless one.
Setting Up Your Cost Codes Tab
The Cost Codes tab is your template's dictionary. It lists every way you can spend money. Before you track costs, you have to decide what you're tracking. To learn more, you can check out our guide on how to categorize business expenses.
Start by making a simple table with two columns: Cost Code and Description.
Your cost codes are just simple numbers you give to each expense type. This makes it easier to sort and add up data later. For example, a construction company’s list might start like this:
| Cost Code | Description |
|---|---|
| 1000 | Site Prep |
| 2000 | Framing Labor |
| 2100 | Subcontractor – Plumbing |
| 3000 | Lumber & Plywood |
| 3100 | Drywall & Finishes |
A marketing agency would have a different list, maybe with codes for "Graphic Design," "Copywriting," or "Ad Spend." This list has to fit your business.
Key Takeaway: Spend time making a good Cost Codes list. It's the difference between a messy spreadsheet and a powerful money tool. This is the most important setup step.
Building Your Labor and Materials Logs
Next are the Labor Log and Materials Tracker tabs. These are the sheets you or your team will use every day to record information.
In your Labor Log sheet, create columns for:
- Date
- Job Name / Number
- Employee Name
- Cost Code (here you’d enter the code for the type of work, like '2000' for Framing Labor)
- Hours Worked
For the Materials Tracker, set up columns like:
- Purchase Date
- Job Name / Number
- Supplier
- Item Description
- Cost Code (e.g., '3000' for Lumber)
- Total Cost
Notice both sheets have a "Cost Code" column? This is how we connect everything back to our main list. When you enter a cost, you'll give it the right code. This simple trick lets Excel group and total your expenses later.
Adding Up Your Overhead Costs
Finally, there's the Overhead Costs tab. This one is simpler. Just create a list of all your monthly business expenses that aren't for a specific job.
Your list will include things like:
- Office or Shop Rent
- Utilities (electricity, internet)
- Insurance
- Software
- Office Supplies
- Marketing & Advertising
List each item and its estimated monthly cost. Later, we'll use this to spread these costs fairly across all your active jobs. This step is important because it makes sure every project helps pay for the business's background expenses. This gives you a true picture of profit.
Making Your Template Smart with Formulas
This is where your job costing Excel template starts to work for you. We've set up the "bins" to hold all your data—now it's time to connect them with a few simple formulas. This is what turns a plain spreadsheet into a tool that shows you where your money is going.
Don't worry, you don't need to be an Excel expert. I’ll give you the formulas, explain what they do, and show you where they go. You'll be able to copy, paste, and understand how it works.
Figuring Out Your True Labor Cost
First is the burdened labor rate. This sounds complicated, but it’s just the real hourly cost of an employee. It's not just their wage. It includes extra costs like payroll taxes, workers' comp, and benefits.
To find it, you add an employee's hourly wage to the hourly cost of their "burden" (all those extra payroll costs).
Here’s how you do it:Burdened Rate = Hourly Wage + (Total Annual Burden Costs / Total Annual Work Hours)
Let's say a worker earns $25 per hour. Their annual burden costs (taxes, insurance, etc.) are $10,000, and they work about 2,000 hours a year. The hourly burden is $10,000 / 2,000 = $5.
Their real cost to your business is $25 + $5 = $30 per hour. That $5 difference is profit you lose if you aren't tracking it on every job.
Using a burdened rate makes sure every hour on a project covers its full cost, not just the wage. This is key for good pricing and profit.
Spreading Out Your Overhead Costs
Next, we need to make sure every job carries its share of the business's running costs—like rent, insurance, and software. We do this by figuring out an overhead allocation rate. This spreads your total overhead costs across all the labor hours your team works.
Here’s how you get it:
- Go to your Overhead Costs sheet and find your total monthly overhead. Let's say it's $5,000 per month.
- Next, guess the total labor hours your team will work on all jobs in a month. Let’s say it's 500 hours.
- Now, divide your total overhead by your total labor hours.
The formula is:Overhead Rate = Total Monthly Overhead / Total Monthly Direct Labor Hours
In our example, that's $5,000 / 500 hours = $10 per hour. This means for every hour of labor a job uses, you need to add another $10 to its cost to cover business expenses.
Getting this right is very important. Many small businesses struggle, and 42% operate at a loss or break-even, often because they don't track profit well. Building a job costing Excel template helps you avoid this. For a software project, this means tracking hours for different tasks, which helps with future planning. You can learn more from these valuable insights from Smartsheet.
Calculating Your Job's Gross Margin
Finally, the most important formula: Gross Profit Margin. This number tells you if a job is making money and how much. Understanding tools like the timesheet Excel formula is also useful for calculating hours correctly.
Once you have all your costs added up (materials, burdened labor, and overhead), you can find your gross profit.
Here are the steps:
- Total Job Cost = Total Material Costs + (Total Labor Hours x Burdened Rate) + (Total Labor Hours x Overhead Rate)
- Gross Profit = Total Billed to Client – Total Job Cost
- Gross Profit Margin % = (Gross Profit / Total Billed to Client) * 100
This percentage is your scorecard. A good margin means a healthy business. A low or negative margin is a red flag that something needs to change. With these formulas, your template will do the math for you, showing you your profit on every job.
Creating Your At-A-Glance Job Summary Dashboard
Now we get to the best part—building the main screen for your job costing Excel template. This is the Job Summary Dashboard. It's a single page that pulls all the important numbers from your other tabs into one simple screen. In my experience, this is the most useful part of the whole spreadsheet.
Imagine just picking a job from a dropdown menu and instantly seeing your estimated costs versus your real costs and your profit. This dashboard shows you the health of each project at a glance.
This picture shows how all your costs flow into your final profit number, a process your dashboard will do for you.
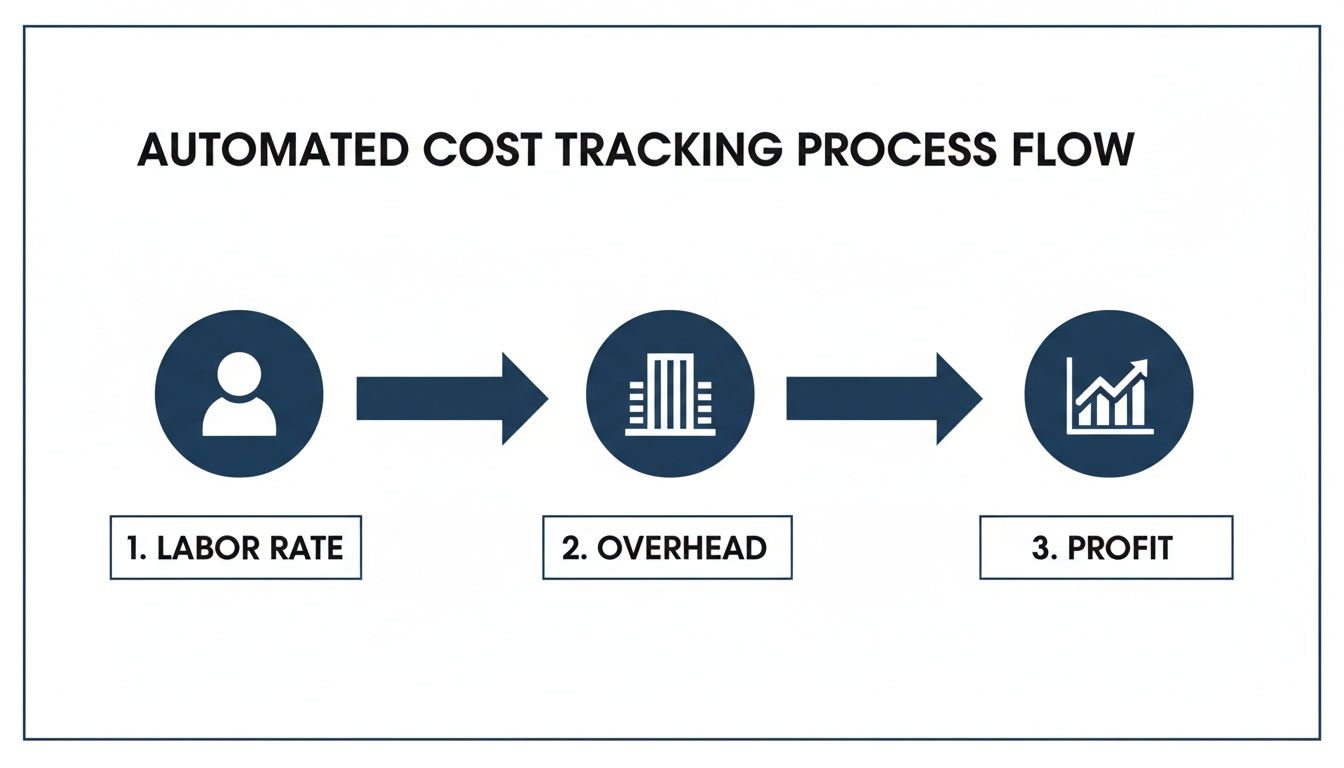
As you can see, your labor rate, material costs, and overhead all fit together. Your dashboard will bring them all together.
Designing Your Dashboard Layout
Your dashboard doesn’t need to be fancy—it just needs to work. The whole point is to see the most important numbers without hunting for them.
First, create a new worksheet and name it “Dashboard.” At the top, we’ll add a dropdown menu so you can pick which job you want to see. This single feature makes the dashboard so useful.
Below the dropdown, you’ll lay out your key numbers in a simple grid. Think of it like a car's dashboard—you want to see your speed (spending), fuel (budget), and temperature (profit) all at once.
Key Metrics for Your Job Summary Dashboard
Here's what to include on your dashboard. I tell every client to include these for a clear picture of any project.
| Metric | What It Shows You | Why It's Important |
|---|---|---|
| Total Estimated Cost | The original budget for the job. | It's your starting point for measuring how you're doing. |
| Total Actual Cost | The up-to-the-minute total of all expenses logged so far. | Gives you an honest, current view of where you are with money. |
| Cost Variance | The difference between your estimate and your actual costs. | Tells you if you're under budget (good) or over budget (bad). |
| Gross Profit Margin | The live percentage that shows how profitable the job is right now. | The most important number. Is this job actually making you money? |
| Billed vs. Received | Tracks what you've invoiced the client and what money you've actually received. | Shows you if you have cash flow problems. |
This setup gives you a complete financial picture of any job in seconds.
The Formulas That Make It Work
To make your dashboard update on its own, we'll use one of Excel's most useful functions: SUMIF. It might sound a bit technical, but the idea is simple. You're just telling Excel, "Add up all the numbers in this column if they belong to a certain job."
For example, to get your total material costs for a job, the formula would look like this:=SUMIF(MaterialsTracker!B:B, Dashboard!B1, MaterialsTracker!F:F)
Let me break that down in plain English:
SUMIF(...): This is the function.MaterialsTracker!B:B: "Look in column B of the Materials Tracker sheet (where the Job Name is)."Dashboard!B1: "Find all the rows that match the Job Name I picked in my dropdown menu (in cell B1 on my Dashboard sheet)."MaterialsTracker!F:F: "Then, add up the numbers from column F (the Total Cost column on the materials sheet)."
You’ll create similar SUMIF formulas to pull in your total labor hours and other costs.
The real power here is that once these formulas are set up, your work is done. As your team adds new hours or materials, this dashboard updates instantly. No more late-night math.
Getting this right has a huge impact. A good job costing template has been shown to cut project cost problems by as much as 28%. It helps fix a big problem where 55% of small businesses don't track all their costs, which shrinks their profits. To learn more, ProjectManager.com has good info on how estimate templates can prevent budget issues.
Making the Template Work for Your Business
A generic job costing template is a great start, but its real value comes from changing it to fit your business. Think about it—a plumber and a marketing agency have totally different costs. Why would they use the same spreadsheet?
This is where you turn a simple tool into a custom money-making machine. Let's walk through some changes you can make, depending on your work.
Customizing for Trade Businesses
If you’re in the trades—construction, plumbing, electrical—your work is about labor, materials, and subcontractors. Your template needs to show that. The biggest mistake I see is grouping all materials into one big category. That tells you that you went over budget, but not why.
Let's get more specific. In your Cost Codes tab, it’s time to break things down. Don't just use "Materials." Create separate codes that tell you something useful:
- 3010 – Rough Lumber: All your basic framing wood.
- 3020 – Plywood & Sheathing: Tracking this separately helps you spot price changes from suppliers.
- 3050 – Fixtures (Tubs, Sinks): These are expensive items that need their own line.
- 3060 – Copper Pipe (per foot): When you track by the unit, your next plumbing estimate will be much better.
This might feel like extra work at first, but it pays off. When you review a finished job, you won’t just see that "materials were high." You'll see that copper pipe cost 15% more than you planned. That tells you exactly where to change your next estimate.
Another key area for trades is subcontractor costs. You should create a specific cost code category for them. For example:
- 2100 – Subcontractor: HVAC
- 2110 – Subcontractor: Painting
When you log these costs, add a column for your markup (like 10% or 15%). This simple step makes sure that every time you hire a sub, you're not just passing their cost along—you're getting paid for managing them.
Making these small changes lets you see exactly which materials or subs are eating your profits. You go from knowing that you're over budget to understanding why.
Customizing for Professional Services
Now, let's switch gears. If you run a service business—like a marketing agency or law firm—your biggest cost isn't materials. It's time. Your template must be changed to track your team's hours clearly.
The most important change is to separate billable hours from non-billable hours. Your team might spend 40 hours on a project, but if only 30 of those hours were billed to the client, that's a big hit to your profit.
In your Labor Log, add a new column called "Hour Type" with a simple dropdown menu:
- Billable: Direct client work (writing code, designing a logo).
- Non-Billable: Internal meetings, admin tasks, or fixing mistakes.
This simple change is a game-changer. Your dashboard can now show a "utilization rate" for each project—the percentage of time spent on billable work. If a project's rate is only 60%, you know a lot of your team's time was spent on things that don't make money. That’s a red flag.
Another great change for service firms is tracking project milestones. Instead of just looking at a job's total cost, you can tie costs to specific project phases. For a website design project, your cost codes could look like this:
- 4010 – Discovery & Strategy
- 4020 – Design
- 4030 – Development
- 4040 – Launch
By assigning every hour and expense to a milestone, you can see if one phase is always taking longer or costing more than planned. Maybe your "Discovery" phase always runs over. That’s a clear sign to either charge more for it or fix your process. This is how your template goes from a simple expense tracker to a smart business tool.
When You Might Outgrow Your Excel Template
Your job costing Excel template is a great tool to get started. Think of it like a hammer—it’s great for what it was made for, but eventually, you’ll need a power drill. As your business grows, you might find you're spending more time fighting with spreadsheets than leading your team.
Honestly, that’s a good problem to have. It's a sign that you’re ready for better financial systems.
Let's be honest, even the best Excel file has its limits. Does any of this sound familiar?
- Entering Data Takes Too Long: Are you or your team losing hours every week just typing in receipts and timesheets? That’s time you could be spending on sales or planning.
- Mistakes Happen: One wrong copy-paste or a deleted formula can mess up all your numbers. Finding and fixing that mistake can be a nightmare.
- Working Together is Hard: Trying to share an Excel file between multiple people is messy. You end up with different versions, and nobody knows which one is right.
- It’s Not Real-Time: Unless everyone updates it instantly (which almost never happens), your spreadsheet is always a little behind. You're making decisions based on old information.
The goal isn’t to give up on tracking your numbers. It’s to find a system that frees up your time so you can focus on growing your business.
What Comes After Excel
So, what’s next? When the spreadsheet starts to feel like a burden, it’s time to look at two main options: special software or hiring an accounting service.
For a construction business, the tipping point often comes when you’re juggling many jobs at once. The need to track change orders and lien waivers can quickly overwhelm a spreadsheet. This is a normal growing pain. Our guide on the best accounting software for construction companies can help you look at some options.
Job costing software is built for this purpose. These programs often connect to your bank, help automate data entry, and let your team update jobs from their phones.
The other choice is to work with an accounting service like MyOfficeOps. Instead of you managing the software, a team of experts handles the numbers for you. We manage the systems and give you clear, simple reports. You get the information you need to make smart decisions—without getting stuck in the data.
Common Job Costing Questions
When you start digging into job costing, a few questions always come up. Here are the ones I hear most often from business owners.
How Often Should I Update My Job Costing Sheet?
This template needs to be updated all the time. Daily is best, but weekly is the absolute minimum. The more current your data, the faster you'll spot a problem with a project.
Think of it this way: making this a quick, daily habit saves you from a huge data-entry headache later. More importantly, it gives you a real-time look at every job.
Your team should log their hours at the end of each day. Material receipts should be entered as soon as they come in. Small, steady updates are the only way to keep it accurate.
Can I Use This Template to Bid on New Jobs?
Absolutely. In fact, that's where it gives you a big advantage. After you’ve tracked a few jobs, you have a lot of your own historical data. You can see your actual costs for different types of work, not just what you thought they would be.
Use these real numbers to build very accurate estimates for new bids. Just copy your template, fill in the details for the new project, and you can create a proposal that you know will be profitable.
What Is the Biggest Mistake to Avoid?
The single biggest mistake I see is forgetting or underestimating overhead costs. It’s easy to remember to track direct costs like labor and materials. But your rent, software, insurance, and even your own salary are real expenses that have to be paid.
If you don't assign a piece of that overhead to every single job, you're getting a false idea of your profit. You might finish a project thinking you made a 20% profit, when you really lost money after accounting for overhead.
Of course, there comes a point when any spreadsheet is not enough. It's worth learning why you can't just use Excel for all data tasks as your business grows.
When your job costing becomes too much for a spreadsheet, it’s a sign of growth. Instead of managing complex tools, let MyOfficeOps handle the numbers for you. We provide clear, simple reports so you can focus on running your business. Schedule your free Discovery Call today.